Still using IIS 6 SMTP Server in Windows Server 2019 or later? After installing the SMTP feature, you can’t configure the server settings!
We all know that we shouldn’t still be using the built-in SMTP server feature in 2024, but lets face it, with everything moving to the cloud, and requiring OAuth or MFA, some of those legacy devices just don’t support these new technologies.
But until your software vendors start supporting these new login mechanisms and you get rid of that 10 year old printer, you’re likely stuck with some kind of proxy SMTP server.
Note: You could of course use a Linux postfix/dovecot server instead – and we’d recommend that you do – these pieces of software have been around for many years and unlike Microsoft’s SMTP server, are still developed and supported!
The Microsoft SMTP Server Configuration Problem
Where we do still setup and support the built in Microsoft SMTP server relay, in recent versions of Windows we have noticed that after you finish installing the feature, when you attempt to configure the server you get a Snapin Error and the MMC window crashes.
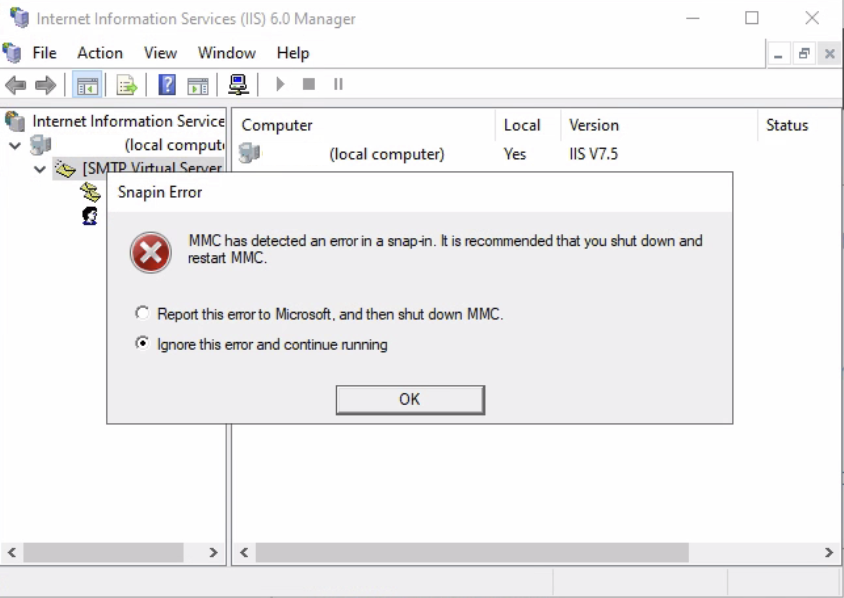
Thankfully, there is a relatively simple fix which will get the management console working again and you able to configure the service.
The Resolution
- Ensure any MMC windows for IIS are closed.
- Open Services (or Task Manager) and locate the Simple Mail Transfer Protocol (SMTP) service and stop it (net stop SMTPSVC).

- Locate the IIS Admin Service service and stop it (net stop IISADMIN).
- In an elevated session edit C:\Windows\System32\inetsrv\MetaBase.xml
(I find the easiest way to edit privileged files is to open command prompt or power shell as admin and then run notepad C:\Windows\System32\inetsrv\MetaBase.xml
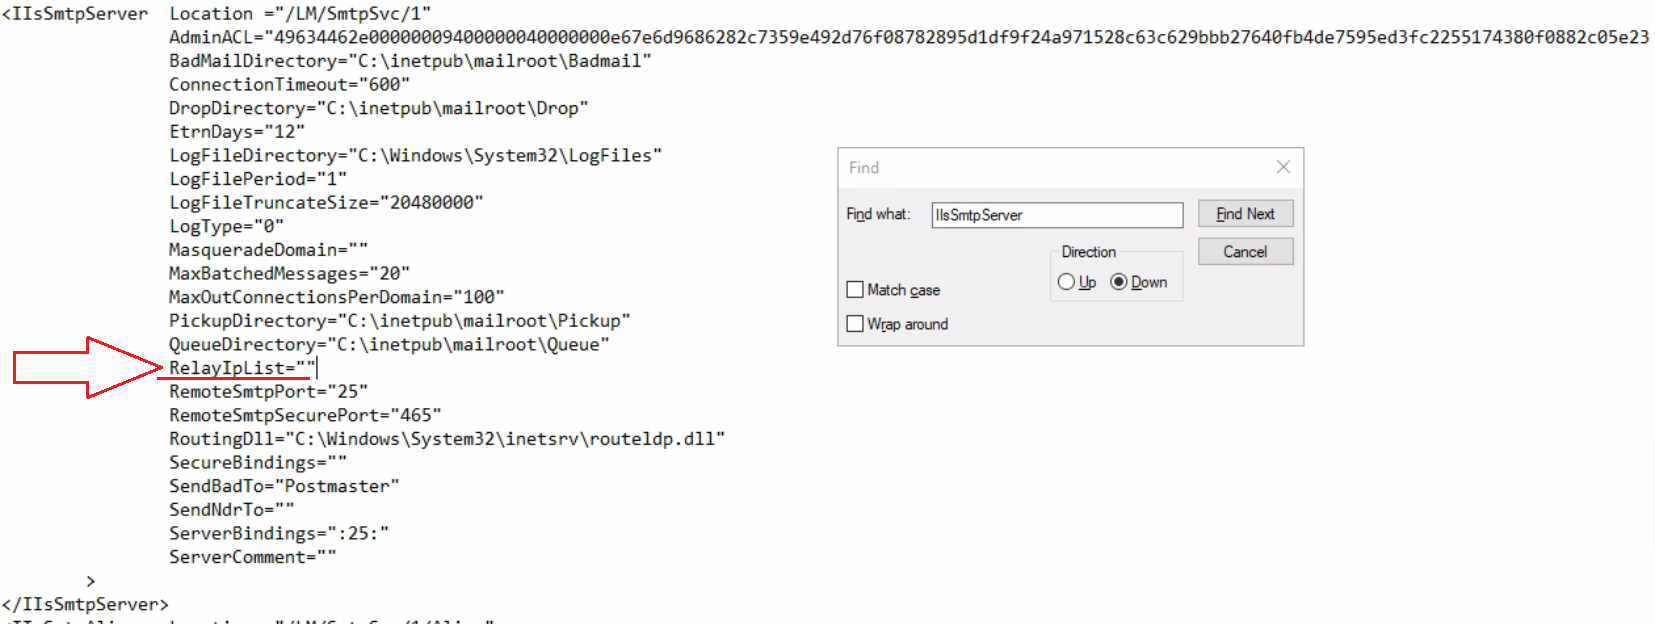
You will need to quote the file path if it contains any spaces. - Search the file for IIsSmtpServer and you should find a config section similar to the screenshot below.
- The parameters under IIsSmtpServer are alphabetical, and the problem stems from a missing parameter in the configuration RelayIpList.
- Add a line, again in the alphabetical position, for us this is between QueueDirectory=”C:\inetpub\mailroot\Queue” and RemoteSmtpPort=”25″ with RelayIpList=”” as below.

- Save and close the file.
- Start the Simple Mail Transfer Protocol (SMTP) service (net start SMTPSVC).
- Start the IIS Admin Service service (net start IISADMIN).
- Now, run IIS 6.0 Manager, right-click [SMTP Virtual Server #1], click Properties, open the Access tab, click the Connection… button and click OK and then do the same with the Relay… button, then click Apply and continue to setup your server as required.
- Note: Don’t forget to change the SMTP Service startup type to Automatic if required, as it defaults to Manual start!


Still need some more help?
We hope that this article has helped you out, but if you’re stuck or need some more help, please contact us and we’ll do our best to help you.